There are two ways to add Wishlist page to your site.
First, if you have imported demo data from theme then you don’t need to make any changes because wishlist feature is already inbuilt in theme demo.
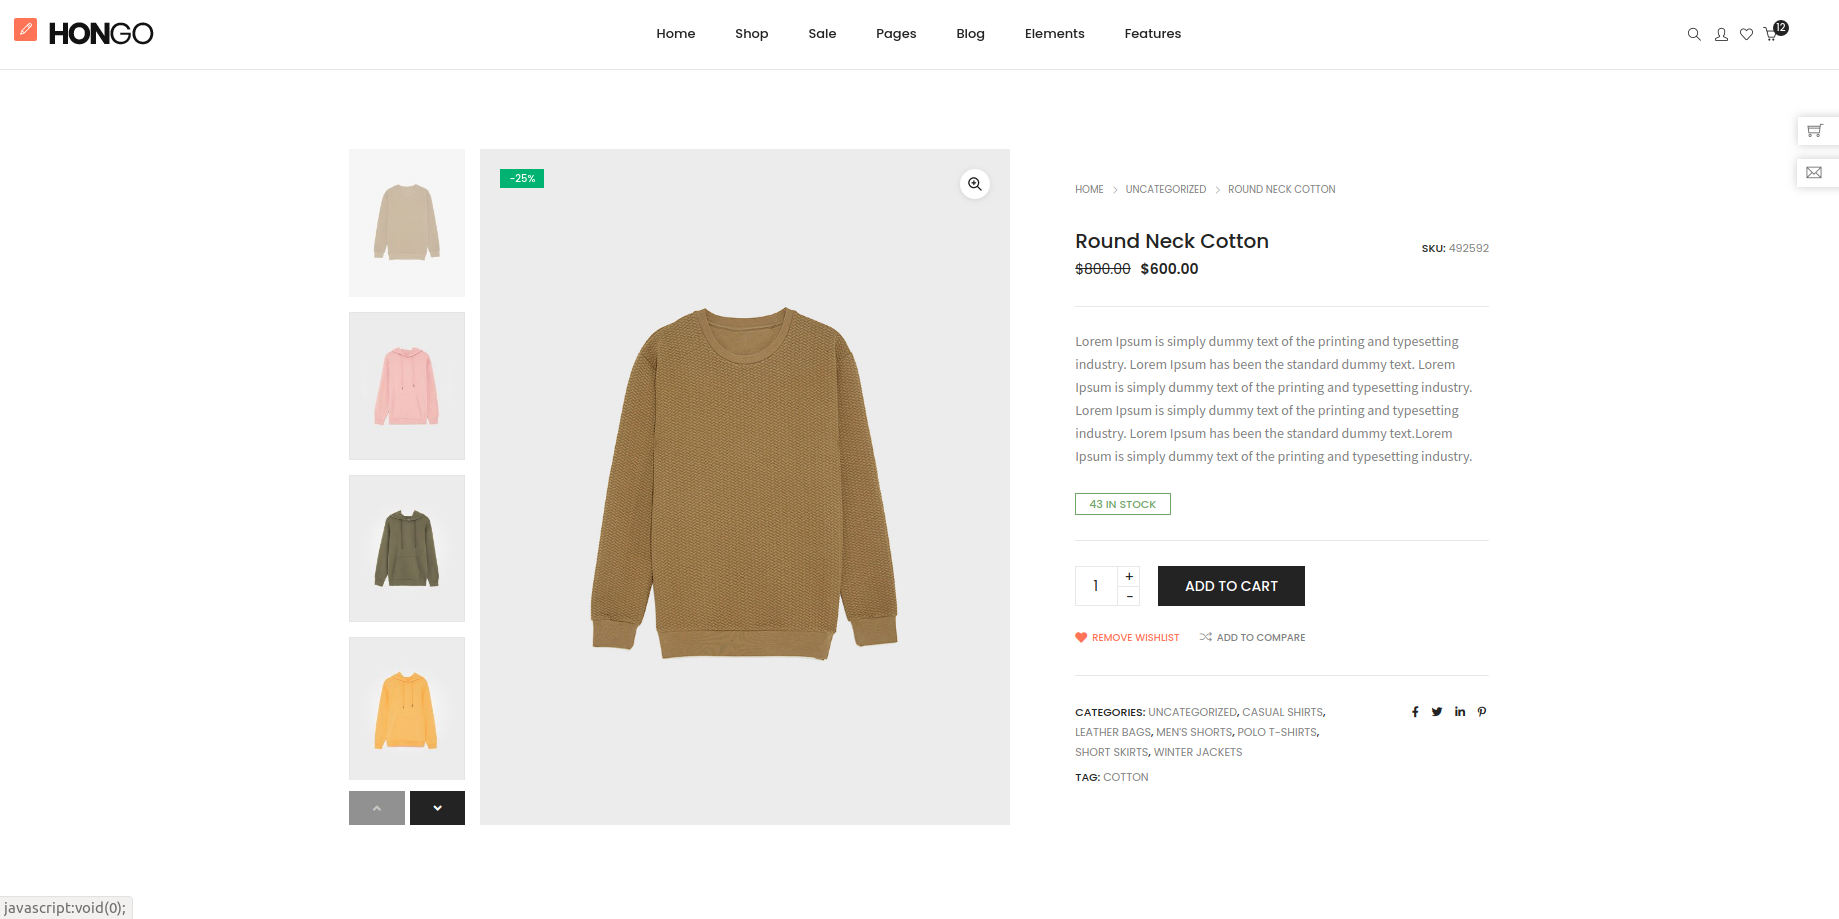
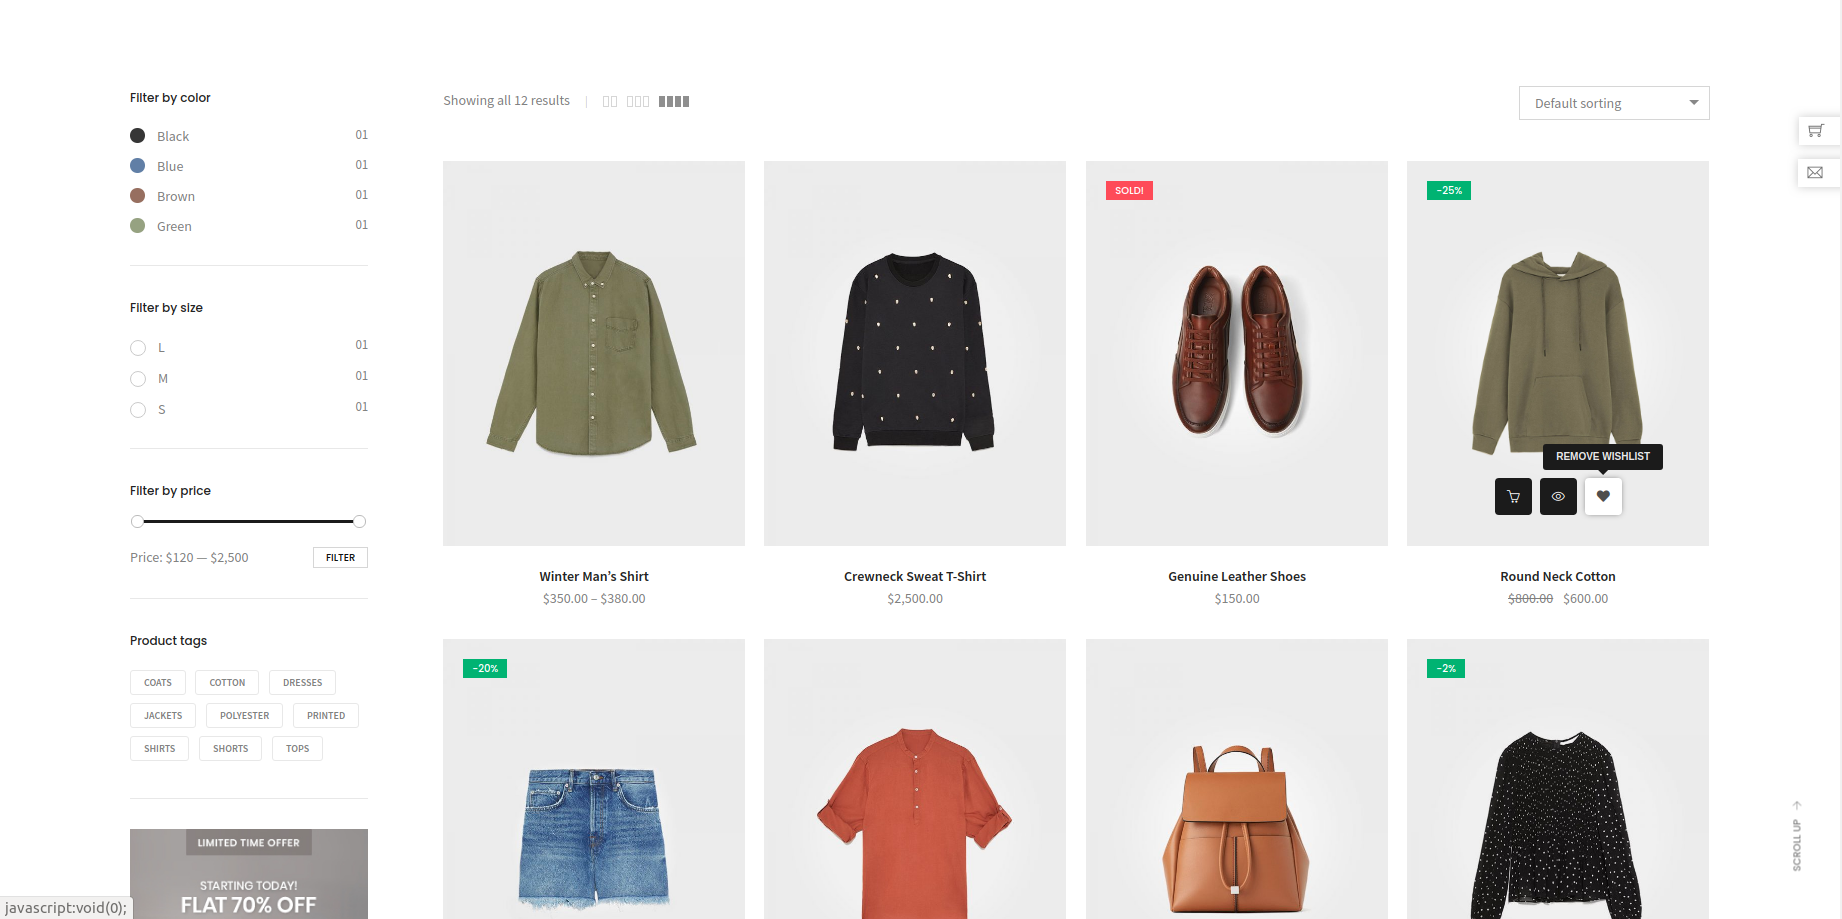
You can see wishlist icon in product page like below image.
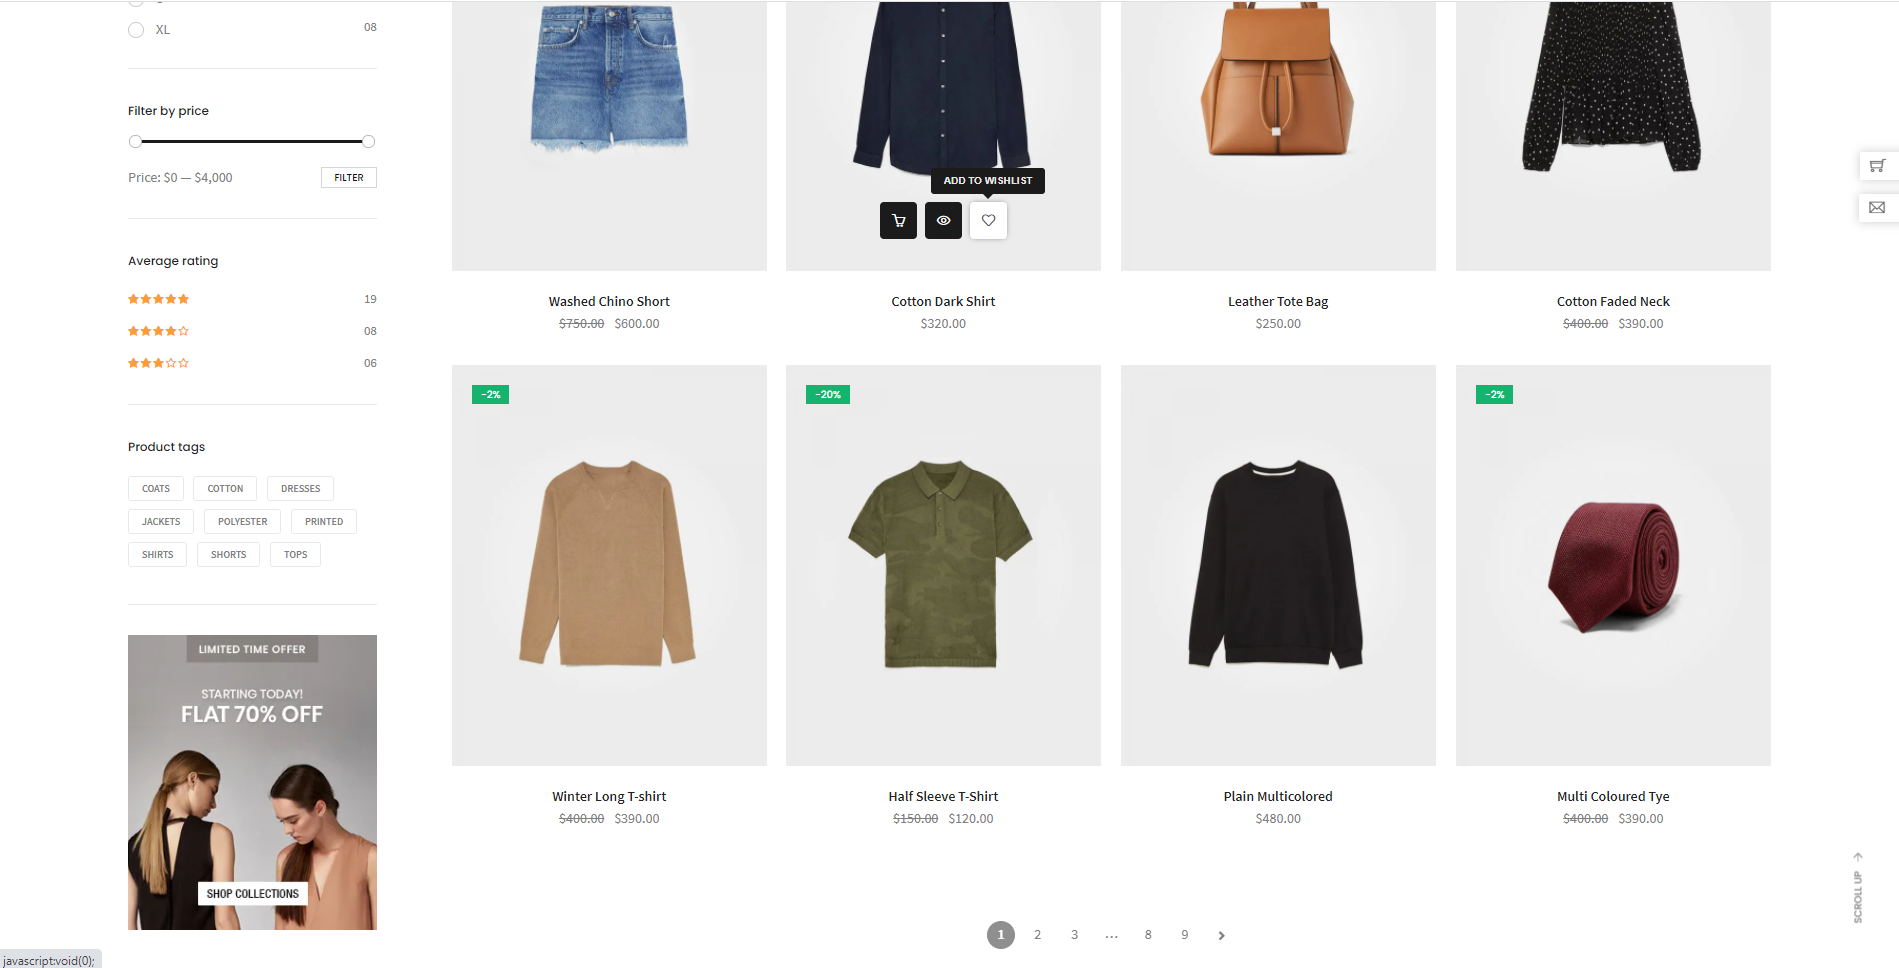
You can also see the wishlist icon on the top right side in header.
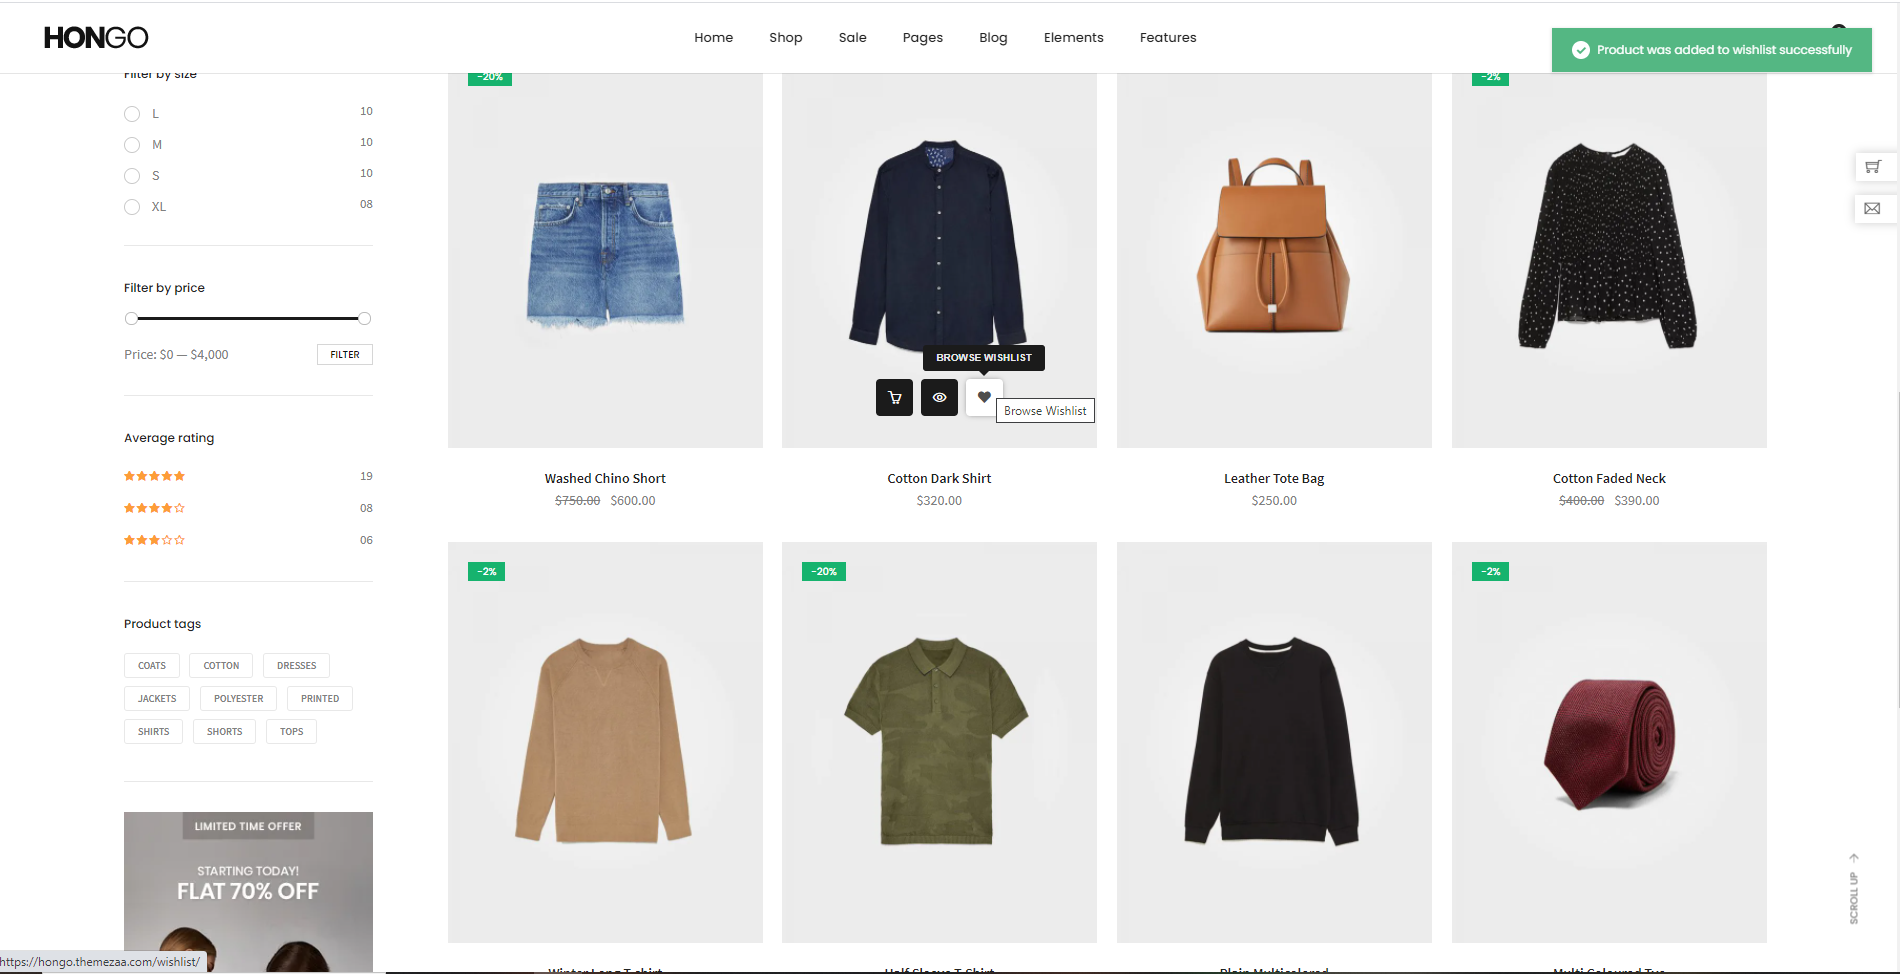
After adding your favorite product in wishlist it will display as Browse Wishlist.
To see, your wishlisted product, you only need to click on Browse Wishlist. See below image for more understanding. Through that you can directly go to wishlist page.
Wishlist page will look like below image.

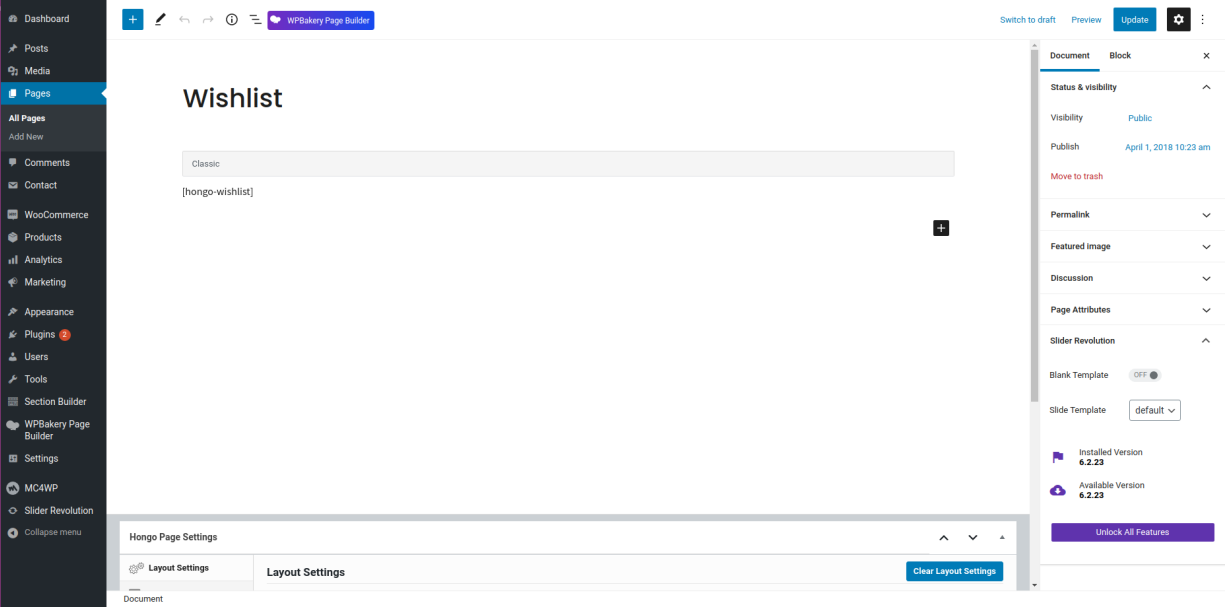
Second, if you did not imported demo data or by mistake removed wishlist page then you first need to create wishlist page by navigating to Pages > create new and add short code as [hongo-wishlist].
See below image to know more.
After creating wishlist page, you also need to select wishlist option by following below path. See below image for more information.
WooCommerce > Settings > Advanced > Wishlist page (Select this option).

After selecting wishlist page option, wishlist feature will be same as demo data. However, if you forget to select wishlist page option from WordPress admin panel, you will only see wishlist page URL on the product page wishlist icon and not able to see in wishlist page. Also you will not able to see wishlist page URL within header wishlist icon.
You can only able to “add” or “remove” wishlist feature.