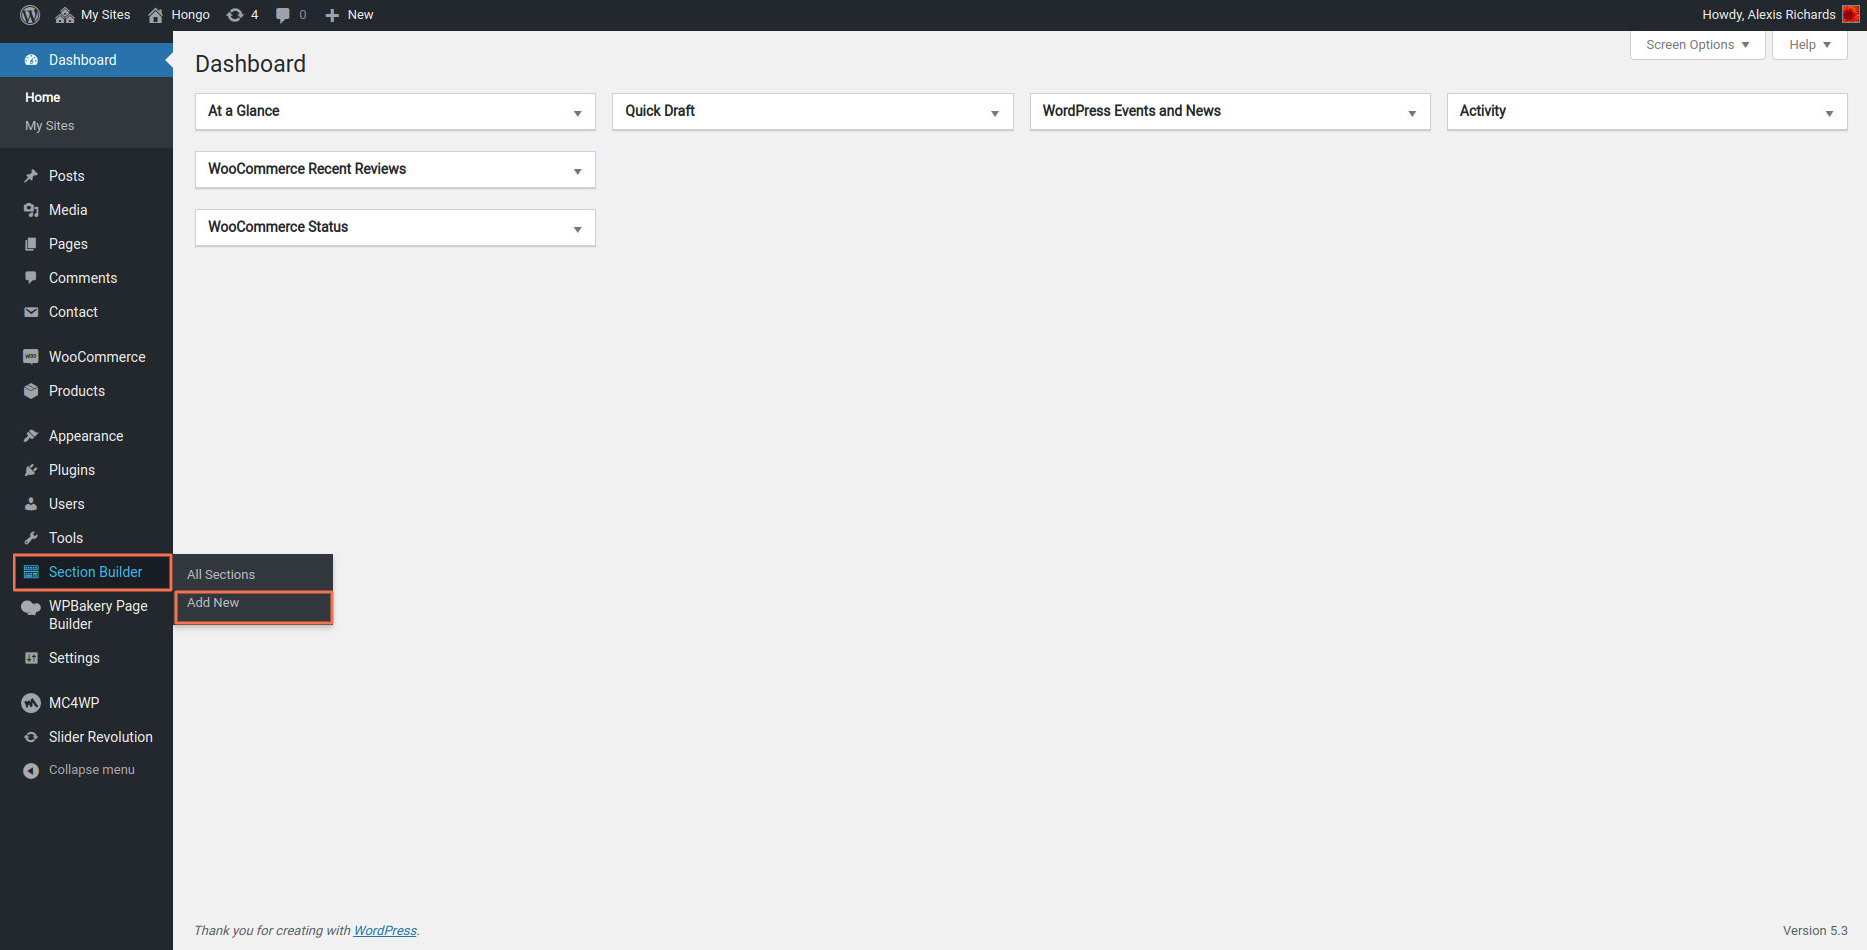
All mini headers manage by section builder so that you can easily create mini header by section builder post type. For that Go to admin panel > Section builder > Add new > Add mini header content such as social icons, contact details, sale details, navigation menu as per your requirement.
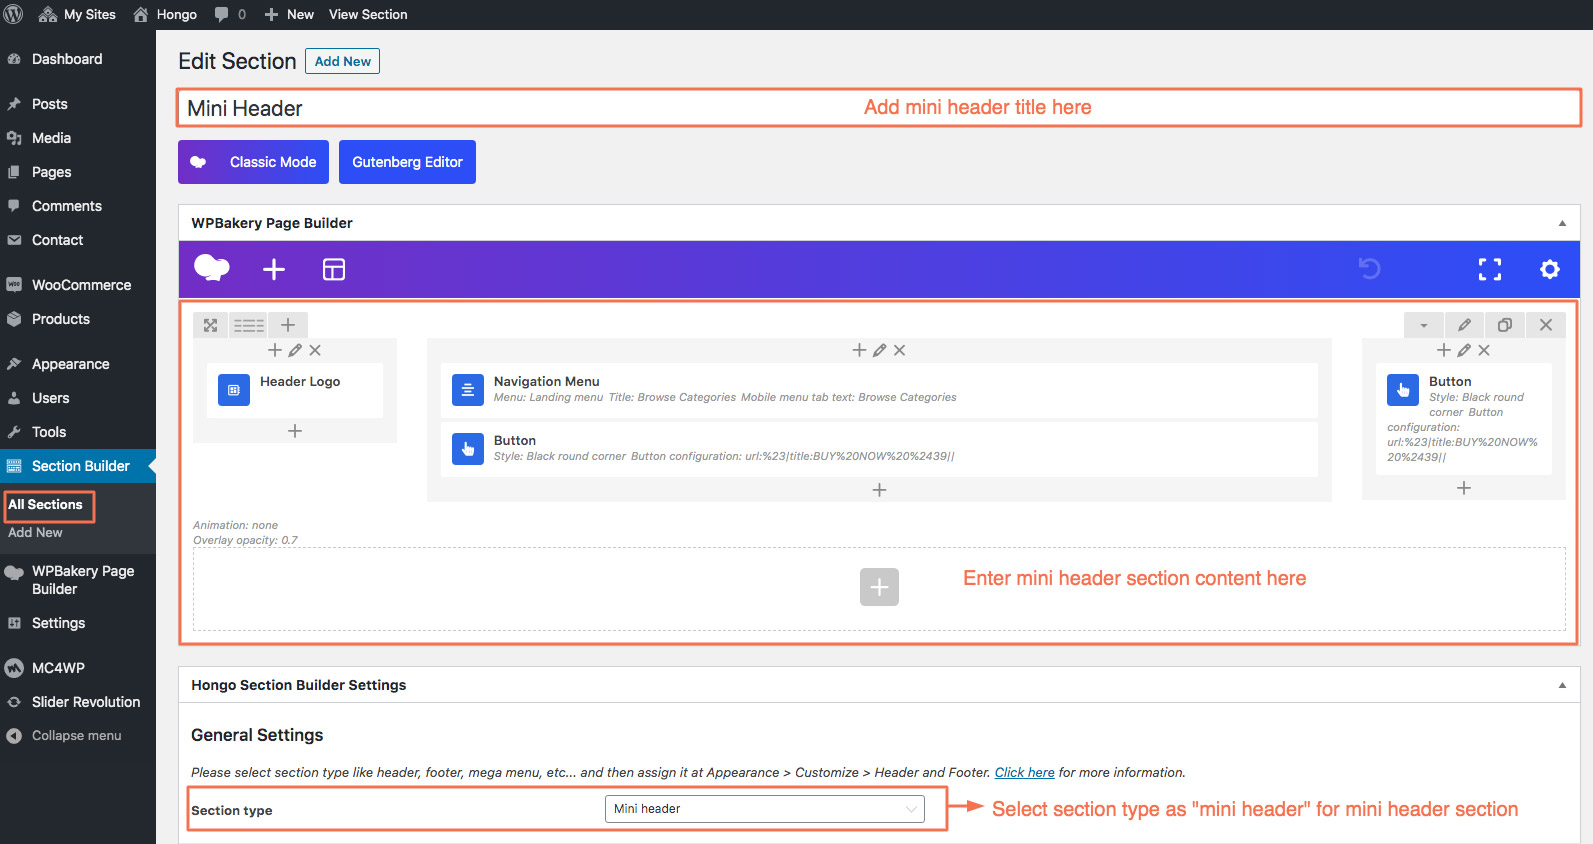
After that go to Wooco Section Builder Settings and select section type “Mini header” for mini header section and select sticky type of this mini header section.
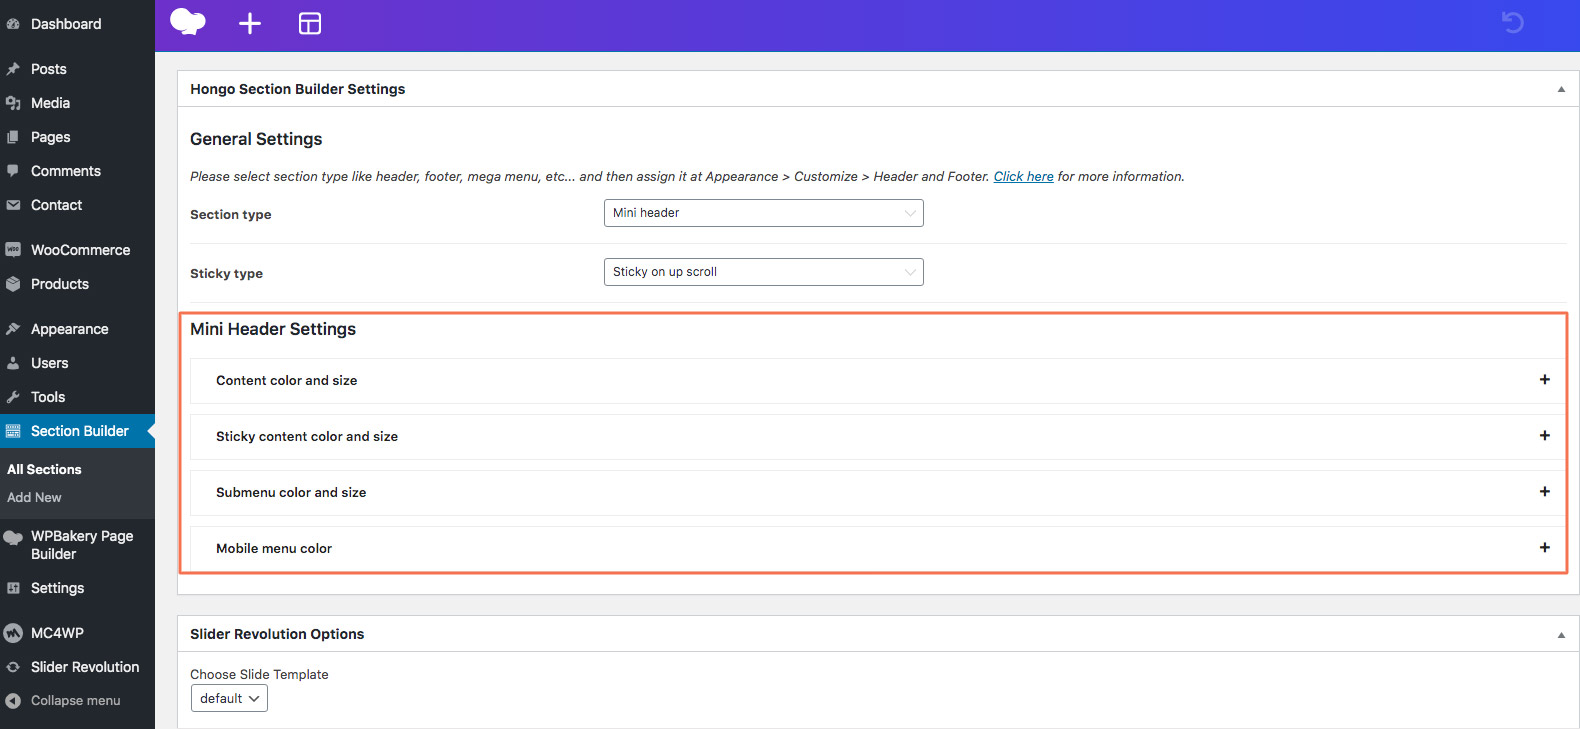
Mini Header Settings
| Content color and size | Content color and size tab for manage mini header content color and typography settings. |
| Sticky content color and size | Content color and size tab for manage mini header content when sticky header color and typography settings. |
| Submenu color and size | Submenu color and size tab for manage submenu color and typography settings. |
| Mobile menu color | Mobile menu color tab for manage menu color in mobile. |
How To Assign Mini Header
You can assigning mini header from two places.
Tip: All mini header section show in dropdown which you have created or imported in section builder post type.
Globally assign mini header
Go to admin panel > Appearance > Customize > Header and Footer > Mini Header. You will find some panels under this as follows.
General: General mini header settings for assign mini header for all over the your website. You can see Mini header section selection option select you want mini header section.
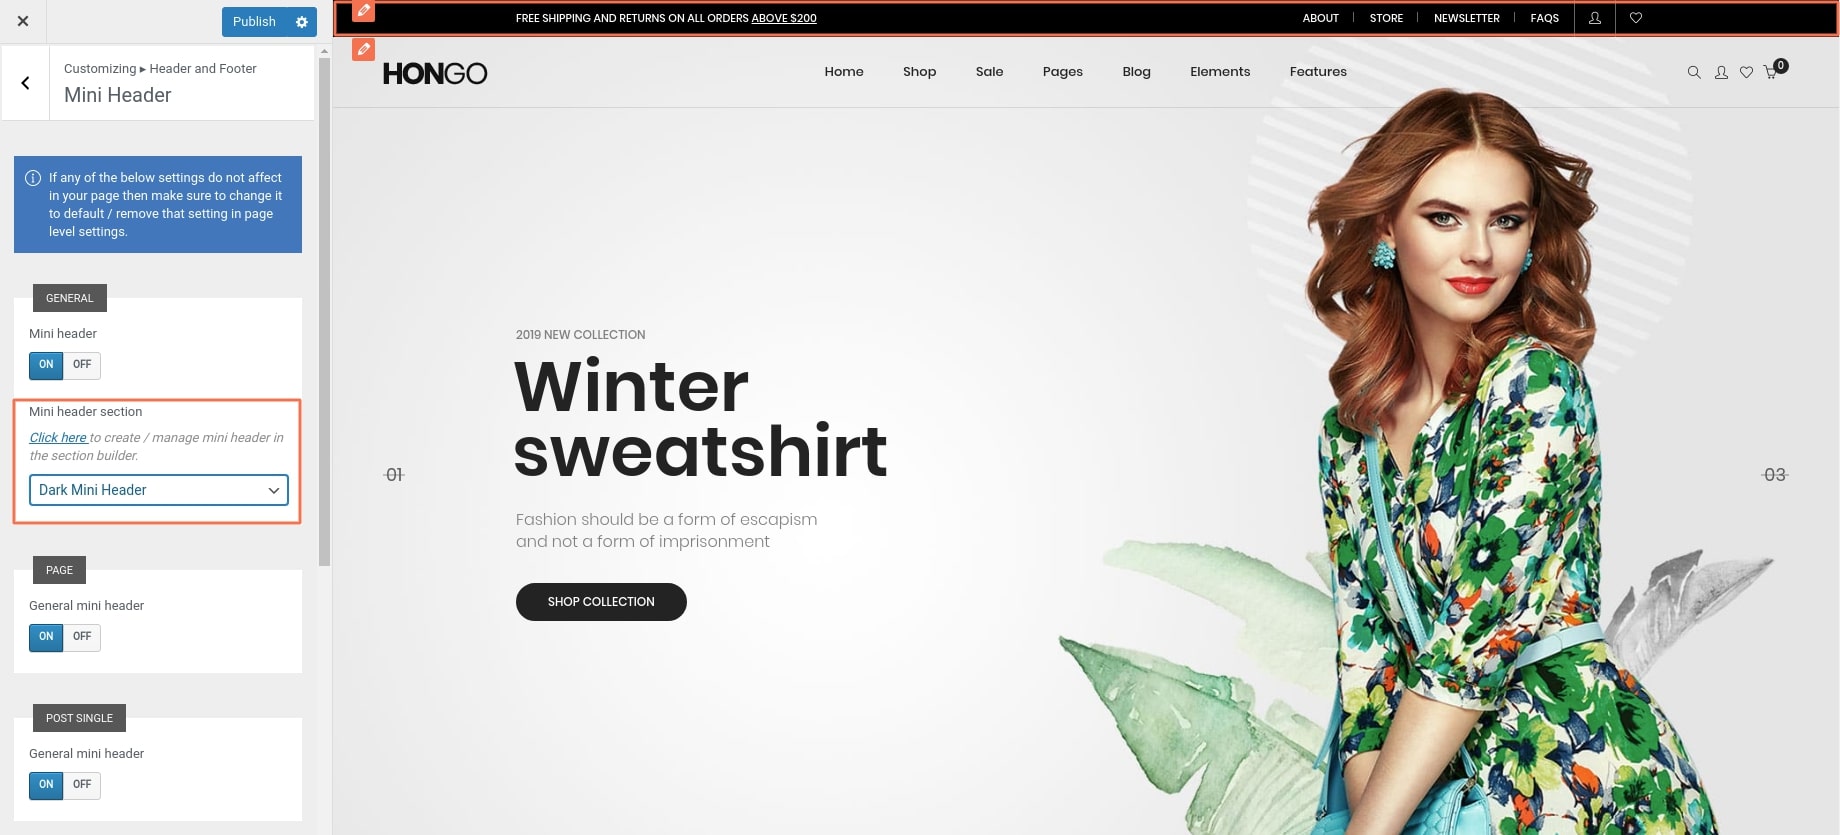
Page: When you have setup mini header global level from general section but you want to assign different mini header style for all pages then use this option and click on “Off” general mini header. To know more see below image and select mini header section and assigned for all pages.

Same settings will work for post single, post archive, Default posts/Blog home, Product single, Product archive/shop.
Individual assign mini header from post, page, product
You can also change mini header for single post, page and product as per your needs for that follow below steps.
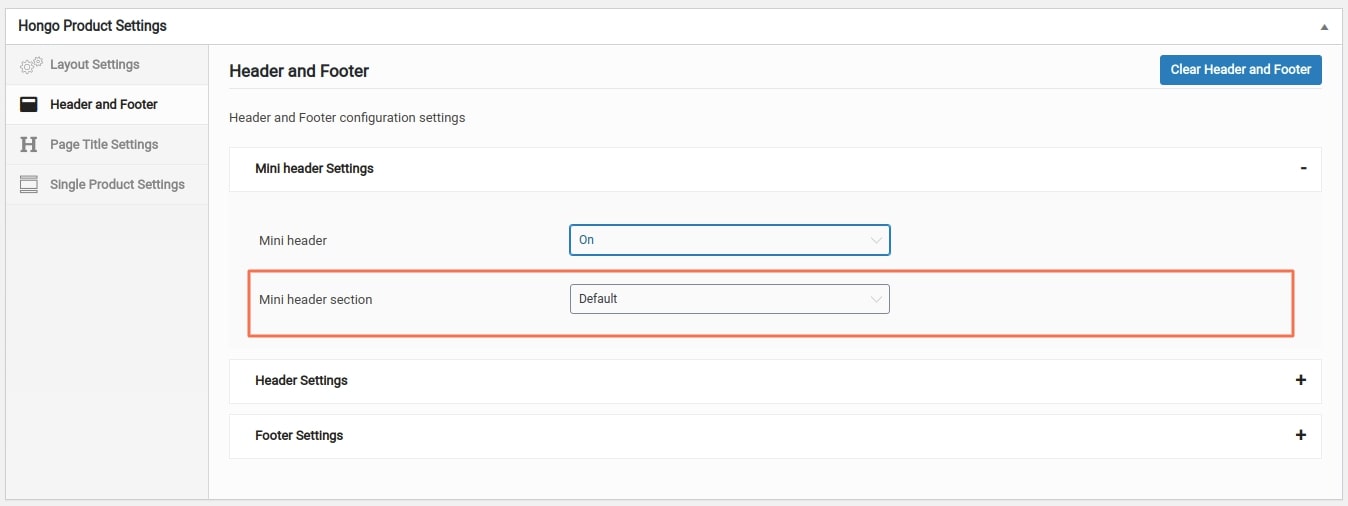
Single Post: Go to admin panel > Edit post which you want to change mini header > Hongo Post Settings > Header and Footer > Mini header section > Select mini header section. See below screen shot for more information.

Page: Go to admin panel > Edit page which you want to change mini header > Hongo Page Settings > Header and Footer > Mini header section > Select mini header section. See below screen shot for more information.

Single product: Go to admin panel > Edit product which you want to change mini header > Hongo Product Settings > Header and Footer > Mini header section > Select mini header section. See below screen shot for more information.