Now that you have created a new business venture with WordPress and Hongo theme for your WooCommerce store, you may be wondering what to do next and how to create a web page in the WooCommerce site. Don’t worry, consider this short guide which will walk you through how to create and manage your first web page.
How To Create page?
Please follow below mentioned steps to create new pages.
Once you have a theme, it’s time to create pages such as an “about”, “testimonial”, or a “contact” page which totally depends on your site goal. So, to crate pages via “Pages” in WordPress feature. Here’s how to do it.
Step 1: Login to WordPress Admin section (Backend area).
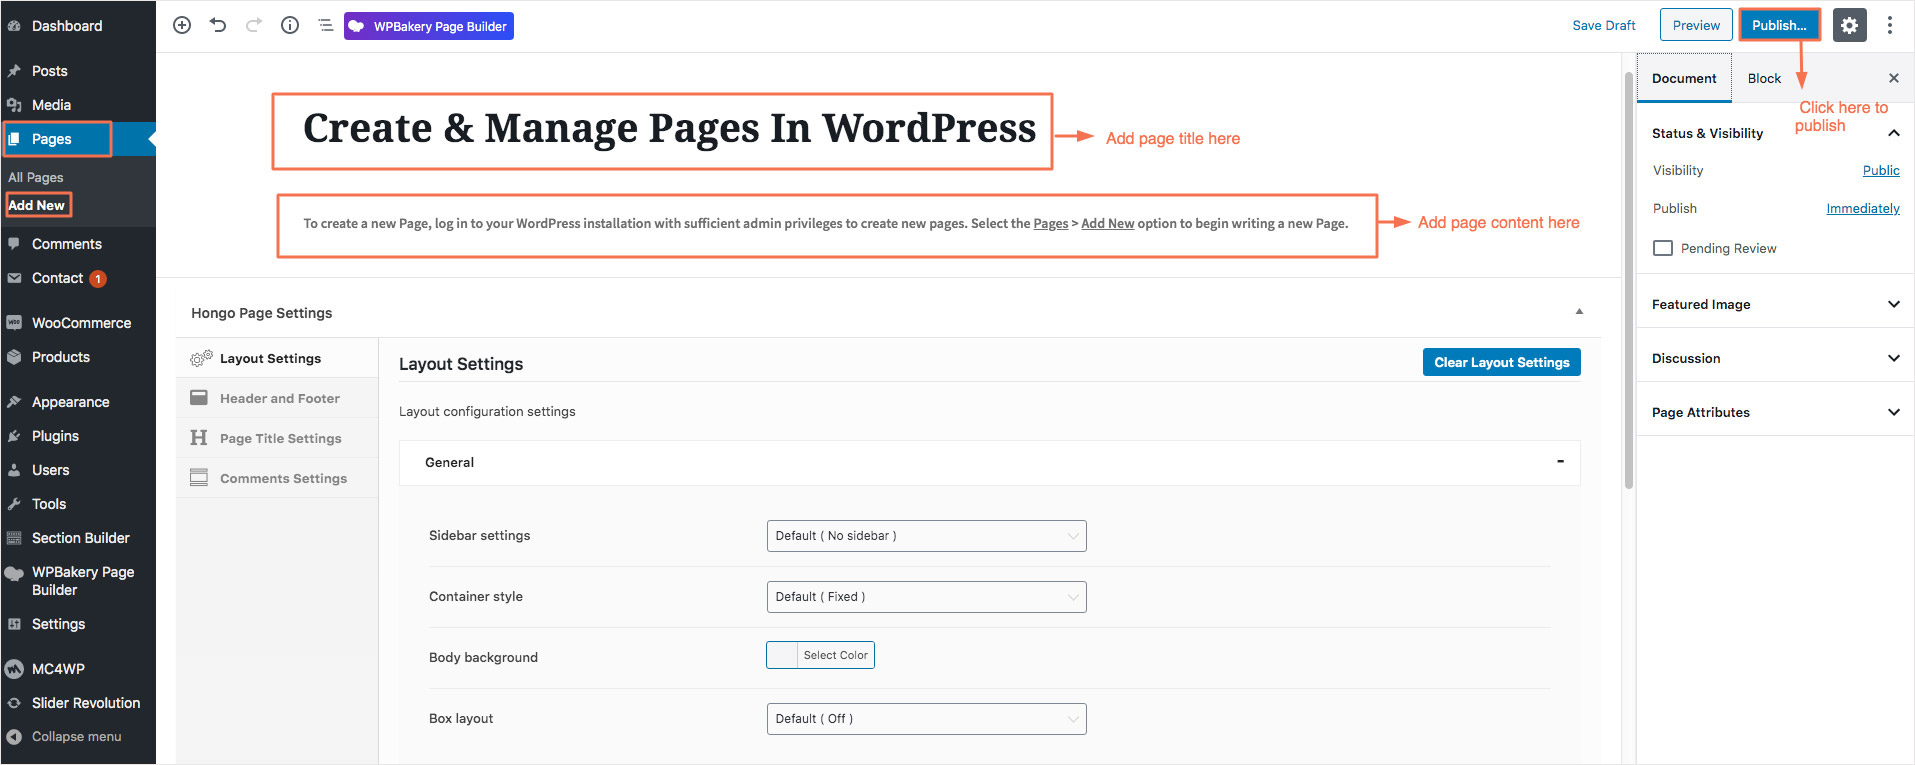
Step 2: Go to Pages Options > Add New.
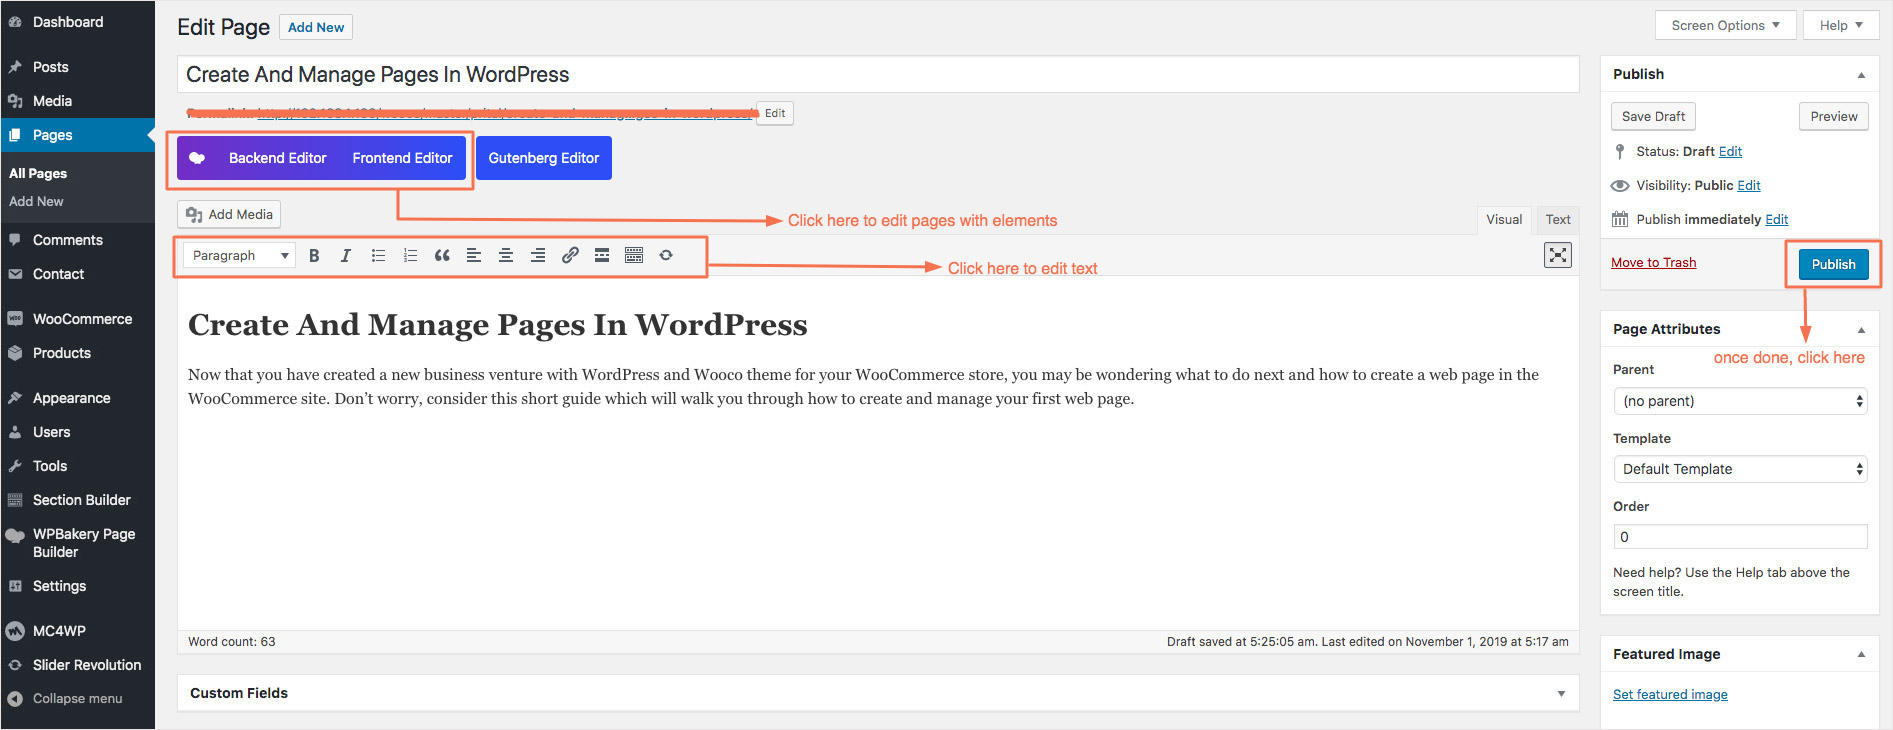
Step 3: Add the page title & content.
Step 4: After adding page title & content publish your page.
How to manage pages?
Once you have created page, this is the time to manage page to edit. WordPress provides default options to manage pages like edit, quick edit, trash, view post in front end. Lets understand each in brief.
Edit: You can use this option in the backend. By this feature, you can edit or change title, content, URL slug, etc.
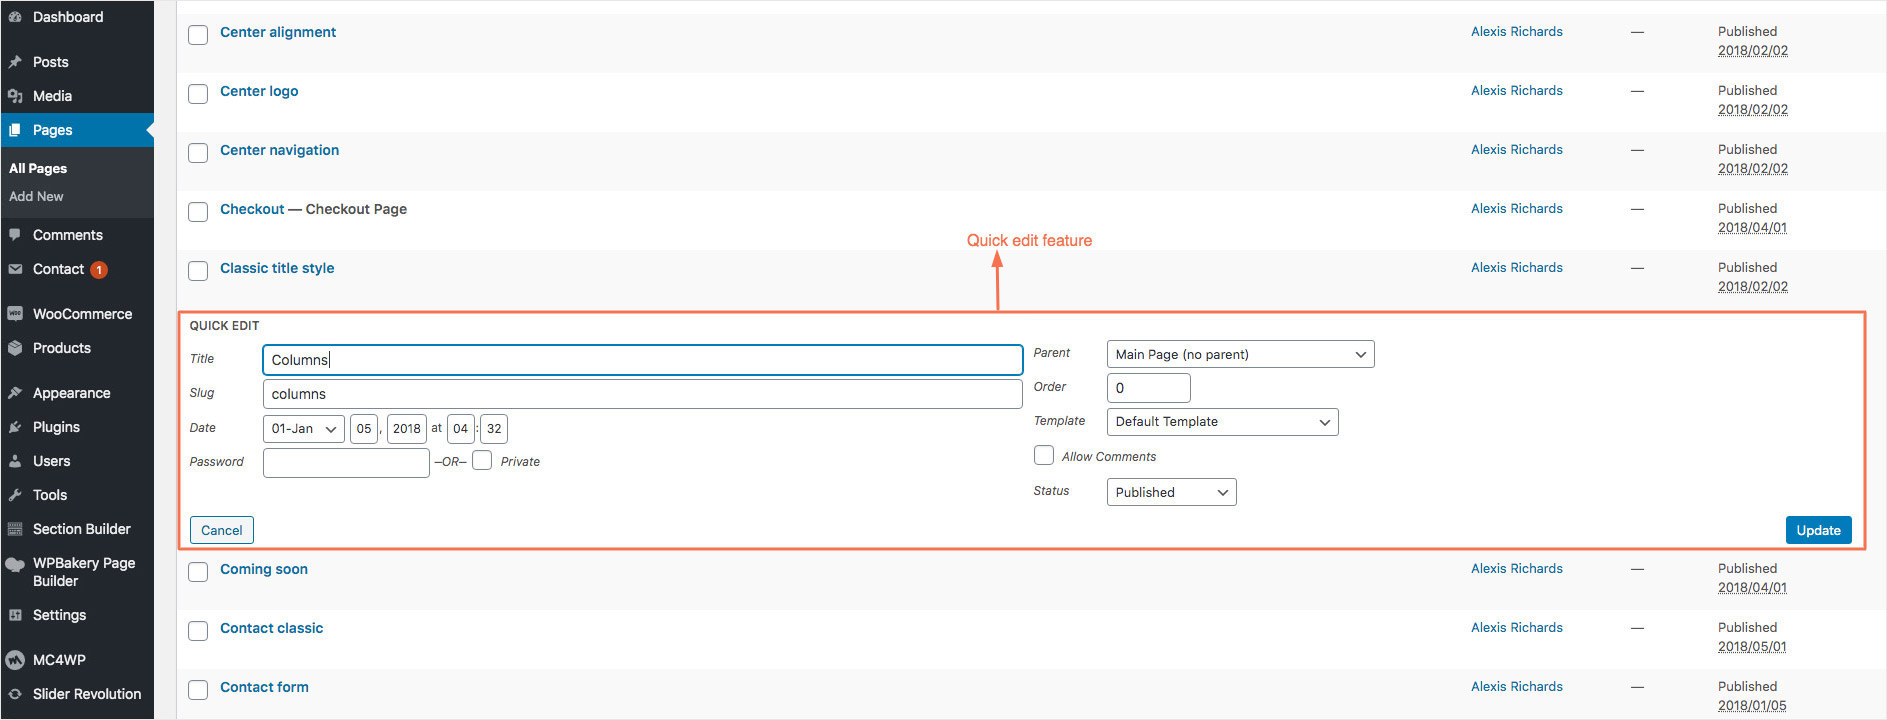
Quick edit: You will get a small window like image below the page title by clicking this option. You will get the main options to edit the page like title, content and slug.
Trash: By clicking this option, your page will get delete and it will be moved to trash bin.
View: By clicking this option, you will be redirected to the page of the same page on front site.